What happens when you plan a spontaneous camping trip in the Similkameen valley with your best friend? Awesome things.
In the beginning of October I booked a surprisingly cheap flight to Vancouver to visit one of my best friends, Leah, who has been living there for the past few years. Funny enough, I also visited her in October of 2019, and she came to meet up with me in Vietnam in October of 2018 (you can read about that year-long trip in my memoir and how I spent only 10k doing it here!). As of this year, we’ve decided to officially make October our friend-trip-iversary month.
In this blog I want to help share what my friend and I came across which we would consider a hidden gem in the Okanagan Similkameen region.
We’re both nature loving, hiking girls, and decided we would do a camping trip and a few hikes together over the Thanksgiving long weekend. Originally, I wanted to go North of Vancouver in search of picturesque mountain peaks, but the forecast for the weekend in that area looked grim. They were calling for rain all day, all weekend. Not exactly the ideal camping and hiking weather. So, we looked at the forecast searching for a general area that was calling for the least rain and headed in that direction. Eventually we landed on a cute camping spot in the Similkameen valley.
To get my two FREE guides ‘Money Saving Tips for a More Meaningful Trip’ and ‘How to Prepare and Pack for Your First Solo Trip’ subscribe to my Substack newsletter.
Since we’re budget travellers, when we rented the car we opted for the ‘surprise’ option which meant that the type of car we got would be random, in exchange for saving $14 on the rental.
We ended up with a cute little Kia Forte, which for our purposes for our adventure into the SImilkameen valley was good enough. However, if you plan on going on many FSRs (forest service roads) you’re going to want to make sure you get a vehicle with better clearance and 4WD. We definitely didn’t fit in with all the RVs driving beside us on the highway, but hey, it got us where we needed to go—and we spent very little on gas!
From downtown Vancouver we put Keremeos into our GPS, which is about 350km from Vancouver. Getting there is super simple! You take the Trans-Canada Highway Eastbound (BC-1 E) to get out of the city, and then merge onto Highway 3 (BC-3 E). We stopped in Hope along the way to grab a coffee and change drivers, but if you wanted to go straight there it would be about a 4 hour drive. And boy was that drive beautiful! After passing through Hope, you drive through EC Manning Provincial Park, which is a thickly forested mountain region. As we drove through I made a mental note that I would like to come back there for another camping adventure.
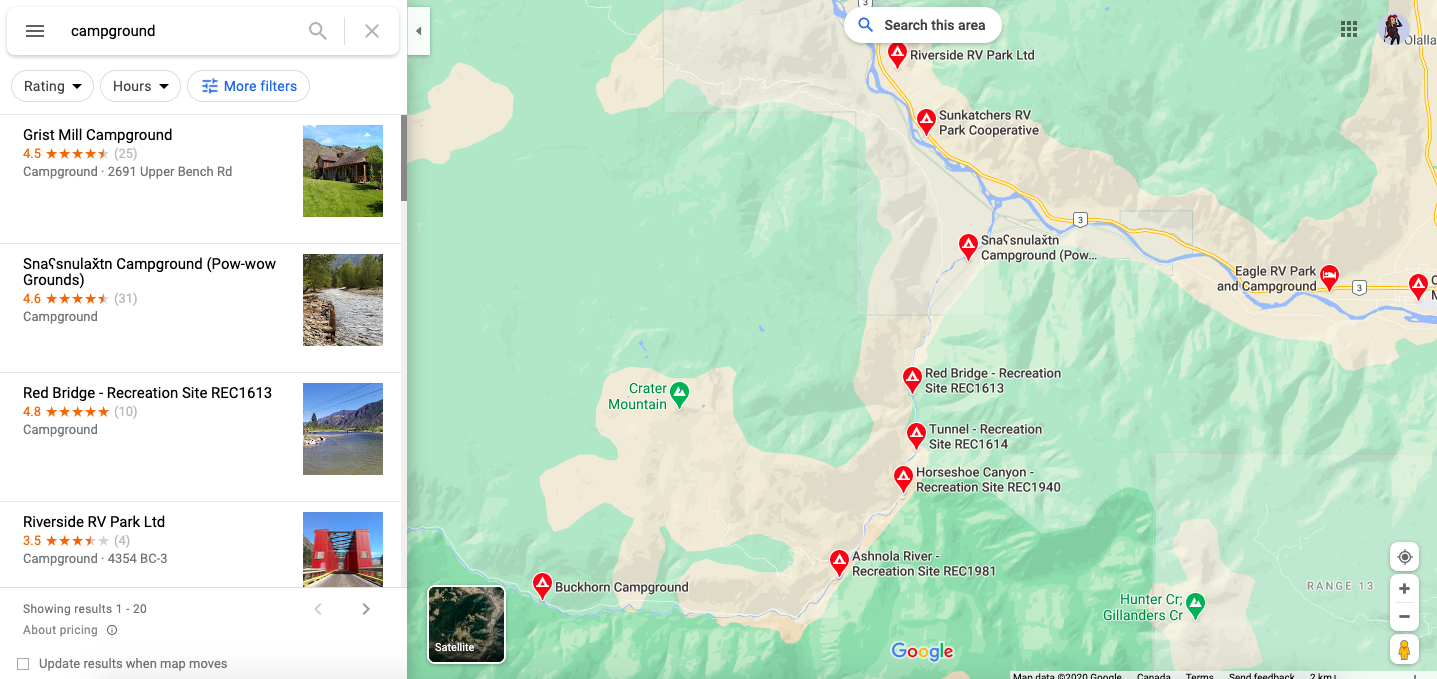
Before leaving Vancouver I had saved a few spots on my map of potential campsites we could stop in and check out once we were in the area. There are two Provincial Parks options to camp at in the Similkameen region: 1) Bromley Rock Provincial Park which is just South of Princeton, and 2) Stemwinder Provincial Park which is just North of Hedley. We wanted to get a little closer towards Keremeos, since a few of the hikes we thought we would go on were further along Highway 3 than those two parks. I came across a bunch of recreation sites and campgrounds which are off of Ashnola Rd (first picture below).
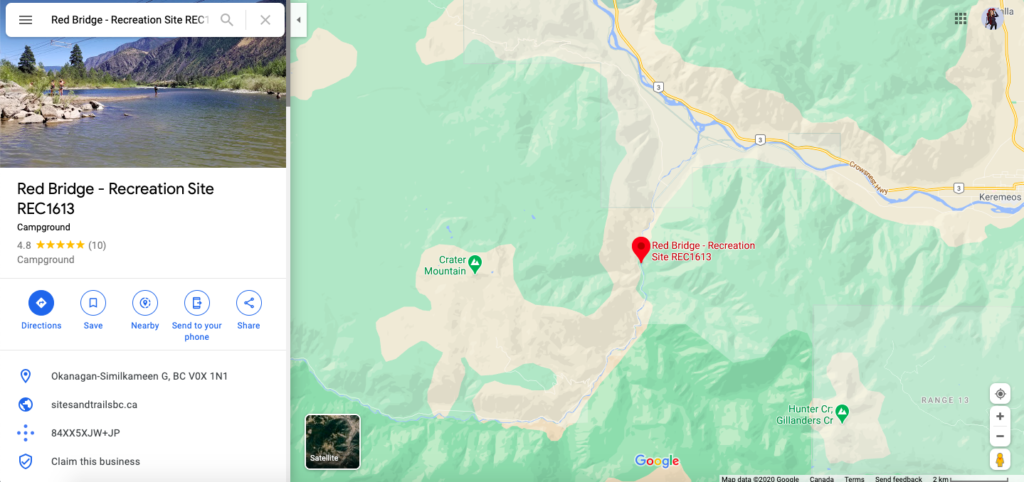
We decided to stop into one of the first ones, Red Bridge (highlighted in the second picture below) since it was closer to the highway, and that this time of year it would be free to stay there—free accommodation is the best kind right? Red Bridge is a small campsite with only 11 spots, and works on a first come first serve basis, even during the summer.
For us this was fine since it was fall and wasn’t busy, but if you are looking to camp during the summer in BC you’re going to have to do a bit more planning in advance. Stay tuned because I’ll be sharing a special article, written by Leah, about how to book and plan a camping trip in BC during the summer time! Another cool fact is that these campgrounds are generally used as a starting point to hike into the Cathedral Provincial Park. That park looks unreal, but is only good for the warmer months. If you are there in the summer time, and are keen for doing some backcountry camping I would definitely look into it if in the Similkameen area.
My opinion of the Red Bridge campground? Awesome. It satisfied all of our desires—quiet, beautiful, and clean.
The campground wasn’t completely empty when we were there, but the campsites are separated enough that you have a lot of privacy. Each campsite has a large picnic table, and fire pit. Many of the sites (like the one we chose in the Similkameen area) are only a few steps from the river which runs along a cliff face don’t worry though, it’s not close enough you’ll be worried of rocks falling onto your tent at night. The scenery is absolutely gorgeous. We also saw eight mountain goats when we were first driving in on Ashnola Rd—so cool!
Though I can’t speak for all the outhouses at Red Bridge, nor do I know what it might be like in the busier months, but I must say that the outhouse near our site was PRISTINE. It was probably the cleanest and least smelling outhouse I’ve ever been in, and it even had toilet paper (that was clean and fully stocked!).
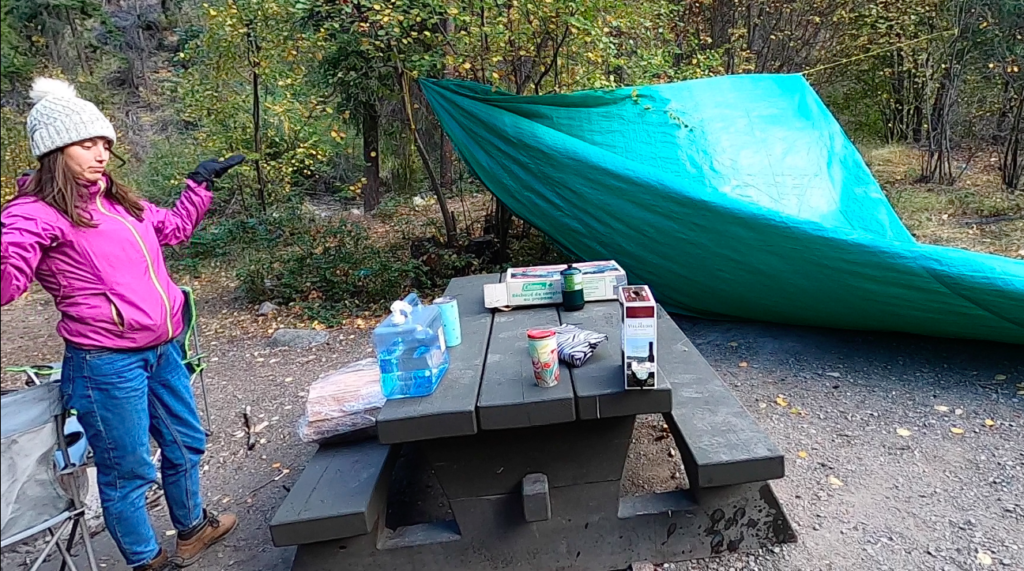
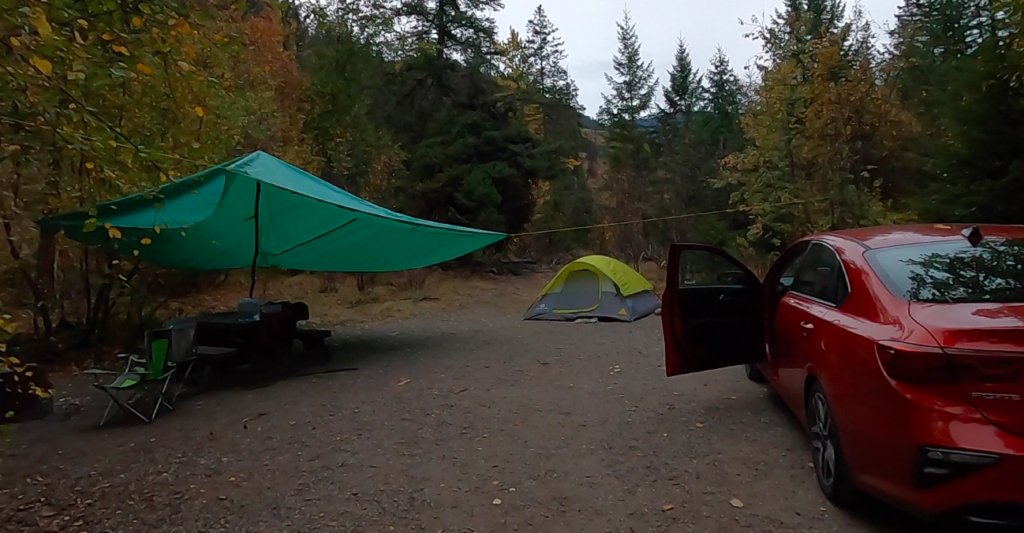
When we got to the campground we first set up our tarp over our picnic table, in case we still got some rain. We did a pretty bad job at it, but we made it work. We also made use of some of the logs that were neatly arranged near to our campsite and taught ourselves how to chop wood (we didn’t do a good job). To see us struggle with these two tasks you can check out my youtube channel, which incorporates an epic time lapse of us putting up the massive tarp. But here’s some pictures of the end result and our campsite.
After our first night, we set out the next day to drive to Apex Mountain for our first hike in the Similkameen area. Getting here is super simple too! An easy way to go about this is to first put in Apex Mountain Resort into a GPS or Google maps. This will take you to the main area, and from there you can continue driving to find the parking lot to the trails. From Ashnola Rd you would take highway 3 into Keremeos and then merge onto highway 3A heading North, and then turn onto Green Mountain Rd.
Our intention was to hike up Apex mountain, but as we got to one turn at the beginning of the trail, there was scary red paint on a large boulder which read “NO PUBLIC ENTRY”. For two young girls in a seemingly deserted area (I imagine the place is only busy during the winter months as it is a ski resort), we decided it was best to opt for the other trail adjacent to Apex mountain—Mount Riordan.
The hike is very easy, and we were thankful that the majority of the trail is forested since it started to snow with a strong wind when we left the parking lot. Before we were in the trees, it was a bit of a struggle getting pelted in the face with snow.
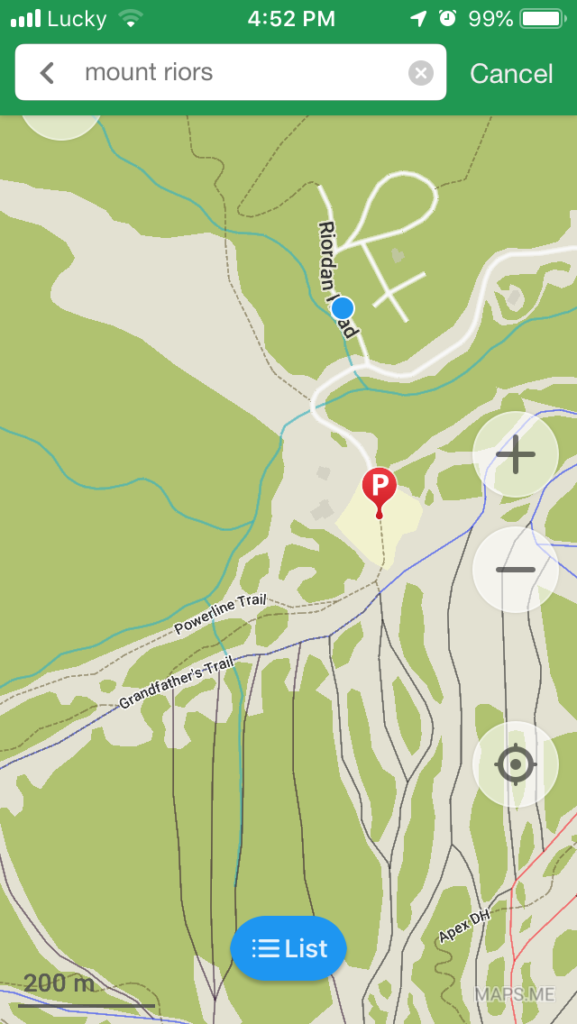
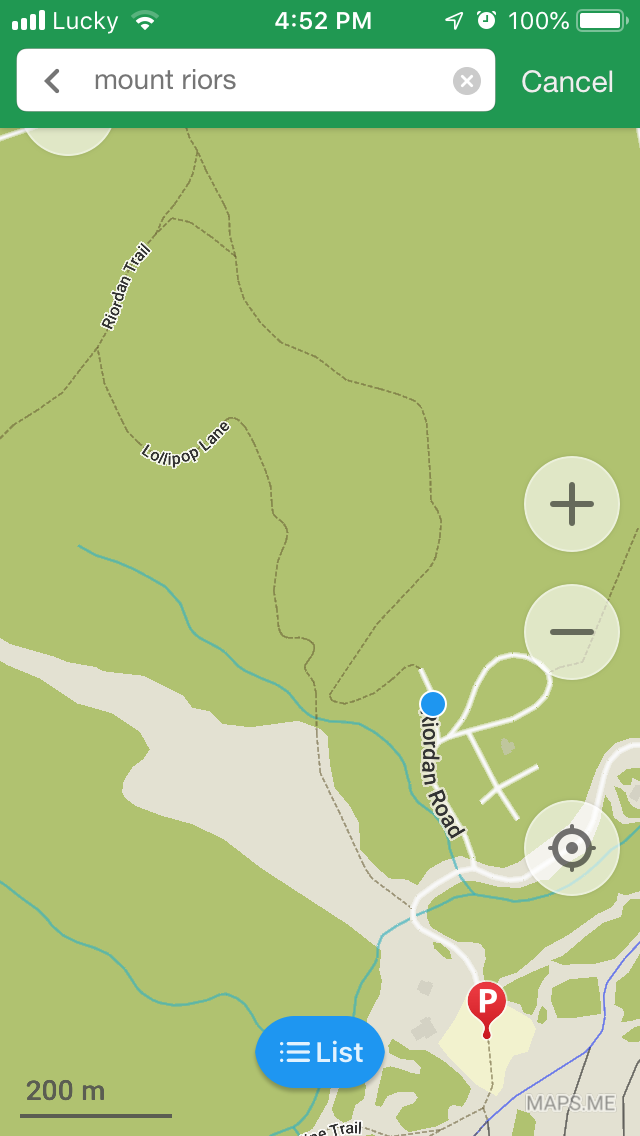
The trails going up to Mount Riordan are well marked, but to get to the main entrance of the trail is a little more confusing. From the parking lot, you want to take the trail that runs along the power lines (marked Powerline trail on the screenshot to the right) which runs perpendicular to the road going straight up the mountain, and is behind the buildings adjacent to the parking lot. I was using the maps.me app in order to get to the trail up to Riordan. Maps.me is my go to offline maps while travelling since it often lists trails on the map as well roads and worked great for me in the Similkameen region.
After taking the powerline trail, you’ll come to where it meets the Riordan trail. This point is a little more obvious as there is a sign at the foot of the trail—it’s the path that leads into the trees.
We only passed one other group of people on our way up, which was a family on a few ATVs. I found the walk up super peaceful and enjoyable as we pretty much had the entire trail to ourselves.
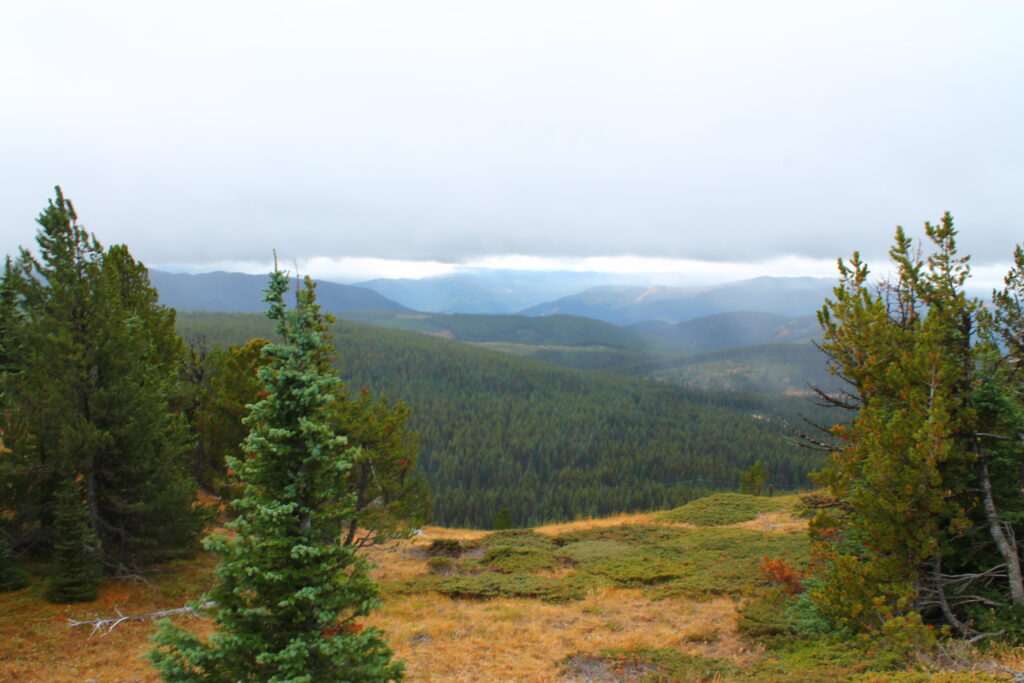
From the top, if the view is clear you can get a great view of Nickel Plate Provincial park and the lake, and peaks of Manning park in the distance. It’s not the most jawdropping view compared to other popular areas in BC, but I think the view of the surrounding area from here is still pretty nice, and probably would have been better if there weren’t so many clouds (and so much snow!).
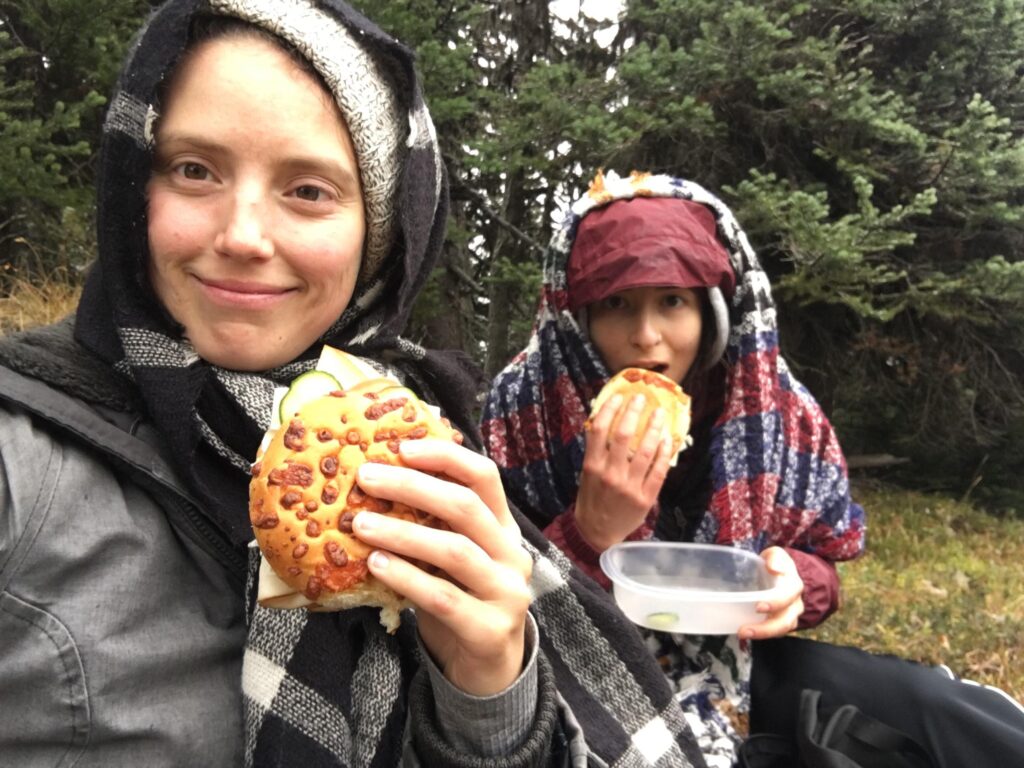
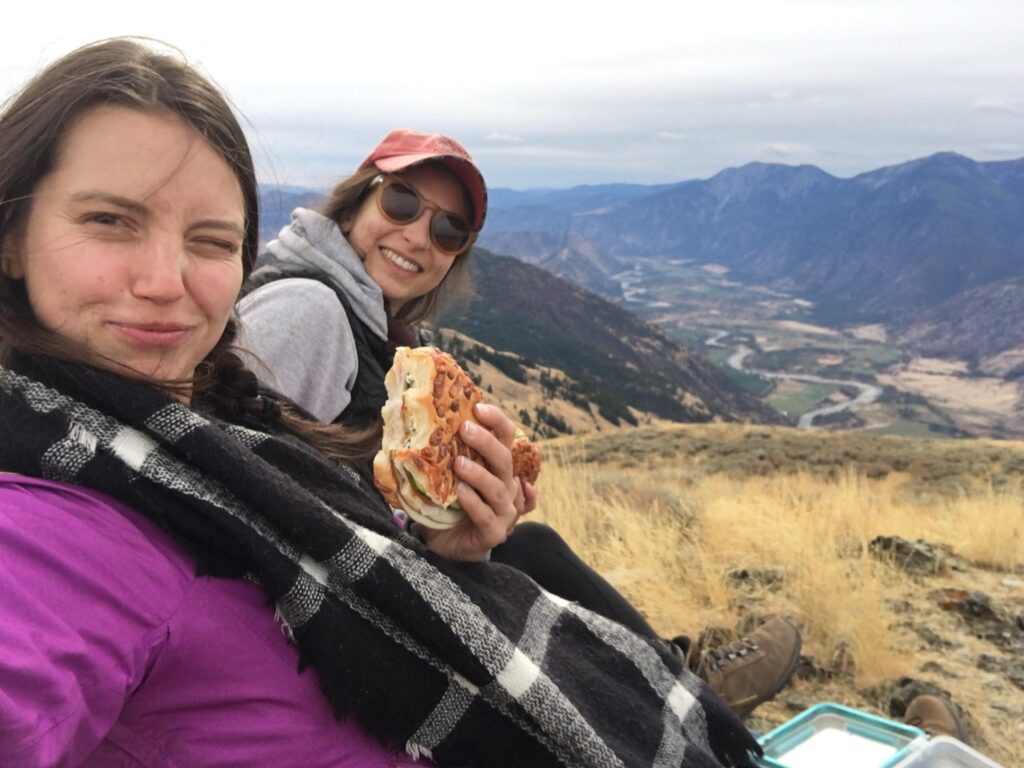
Though we would have liked to sit on the peak while we ate our lunch, the wind was sharp on our face so we found a cozy little nook surrounded by trees to hang out in.
On the way down we took ‘Lollipop lane’ instead of the main Riordan trail (shown on the screenshot to the left). I would suggest taking this one as it’s a smaller foot trail (so no ATVs), and again was well covered with trees. It was easy to follow, and took us back to the road so we could complete the loop back to the parking lot where we started. The entire loop up to the peak and back took us about 1.5 hours. A very easy walk for people of all fitness levels!
The hike didn’t take too long so we had the whole afternoon left to roam the area around Keremeos before heading back to our campsite. Local legend claims the name Keremeos means “the meeting of the winds”. The climate and the amount of wind that comes through this valley make it a great place for growing fruits with minimal pesticides, so many organic produce is grown here. The region is well known as the “fruit stand capital of Canada”. Driving along the main highway you’ll see dozens of signs begging you to buy fresh peaches, apples, and many other fruits and vegetables. The area is also famous for growing grapes, and thus you’ll see dozens more signs directing you to wineries from the highway.
The purpose of our trip wasn’t to go wine tasting, but we did stop into two just because we had some spare time. We also took advantage of all the fresh produce. We loaded up on corn and vegetables to cook on the fire, and fresh fruits for hiking snacks. I’m pretty sure the apples we got there were the best ones I’ve ever had. Problem is I don’t remember the kind of apple it was. Sigh, I digress…
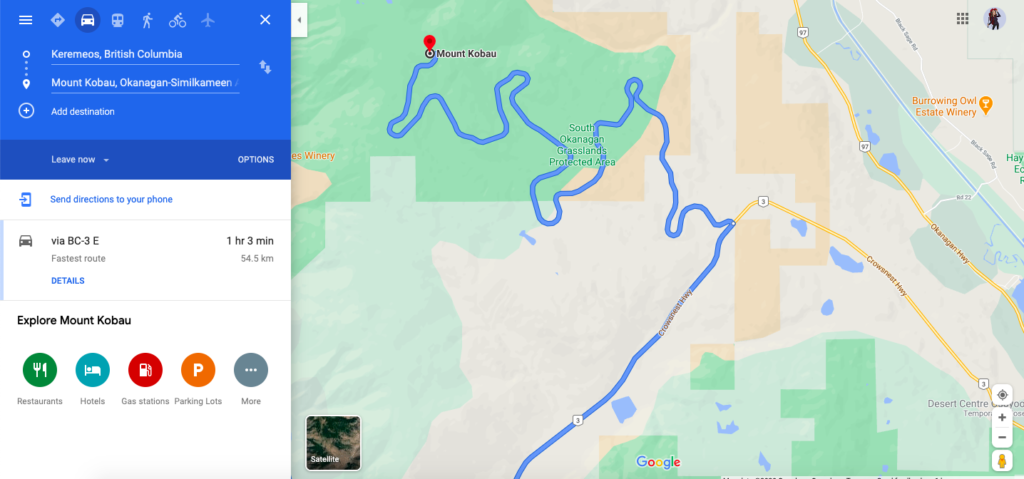
The next day, we headed in a different direction in the Similkameen region to Mount Kobau. To get there from Keremeos, you would continue on Highway 3 which goes South towards Osoyoos. Before reaching Osoyoos, you would take a left onto Kobau Look Out Service Rd. The road isn’t very obvious, I actually almost drove past it, so I would suggest keeping an eye on a map while trying to find the road. Here’s a screenshot of the Google directions on how to get there from Keremeos, which shows you were the turn off to the FSR is.
Like I said, a lot of the time with FSRs you’ll want a vehicle with greater clearance, but I’m happy to say that this gravel road was quite smooth. We were driving pretty slow, and a lot of people in their pick up trucks were zipping past, but our little Kia Forte did the trick. So if you’re looking into going to Mount Kobau don’t be afraid of this road! I promise whatever rental you are driving will do just fine!
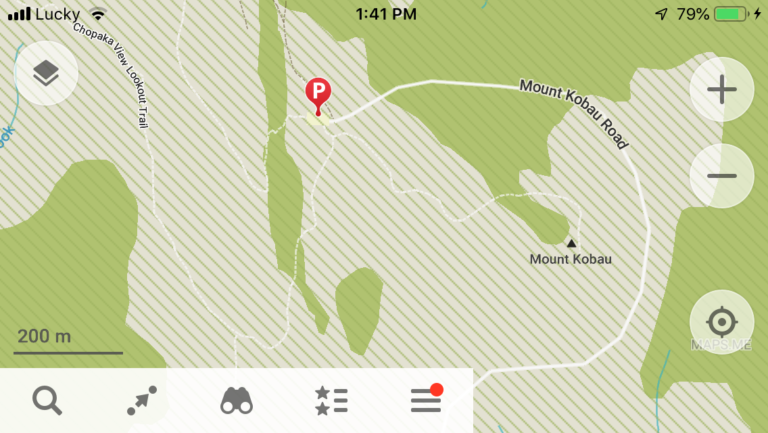
Once you get to the parking lot, there are two main walking trails you can take. The first spot we walked to was the main Kobau look out trail for a view of the Similkameen valley. From the parking lot, there’s a sign that will point you in the direction of that trail, which is the dotted line heading towards Mount Kobau on the map below.
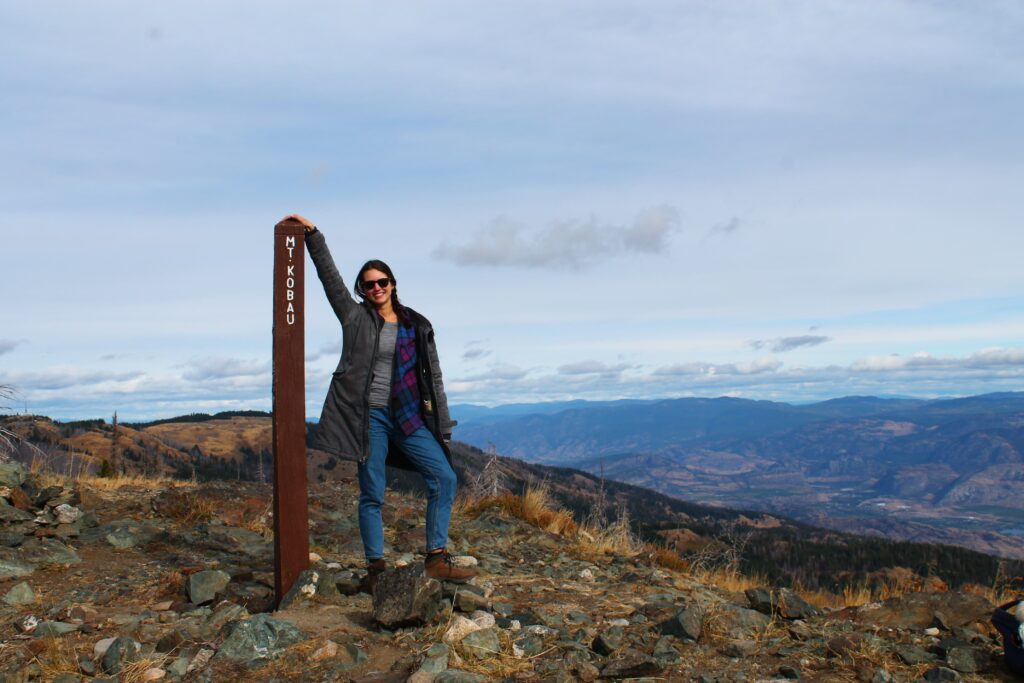
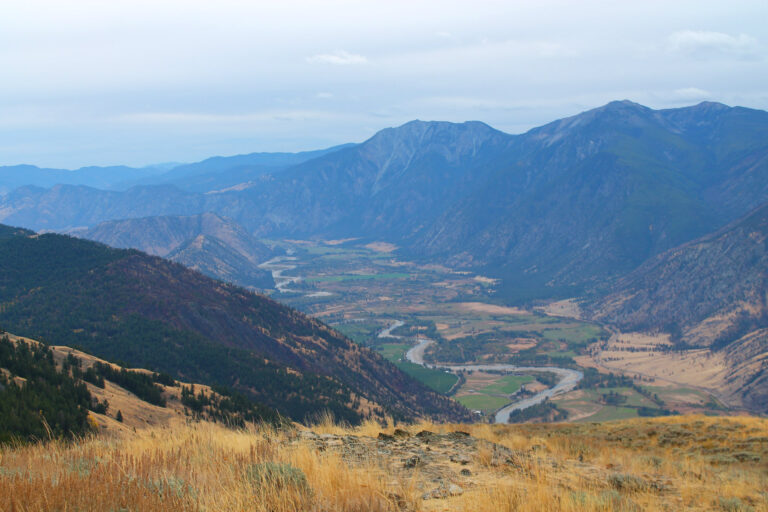
It’s a really short walk up, and isn’t very steep. I think the walk up takes about 15 minutes. But the views from there did not disappoint. I’d say this is a minimal effort, great reward situation. You can see the valley, and Osoyoos lake below clearly, as well as the mountains to the West on the other side of the Similkameen valley.
From the peak, we went on the Chopaka View Lookout Trail which is the larger loop on that map above that gives you views down onto the Similkameen valley (where you drove through on Highway 3 to get to Mount Kobau).
Now although the weather was definitely working more in our favour this day, this view definitely impressed me a lot more than the one at Mount Riordan. Rows and rows of mountains rolling across the horizon, and an icy blue river winding through the bottom of the valley—it’s hard not to like.
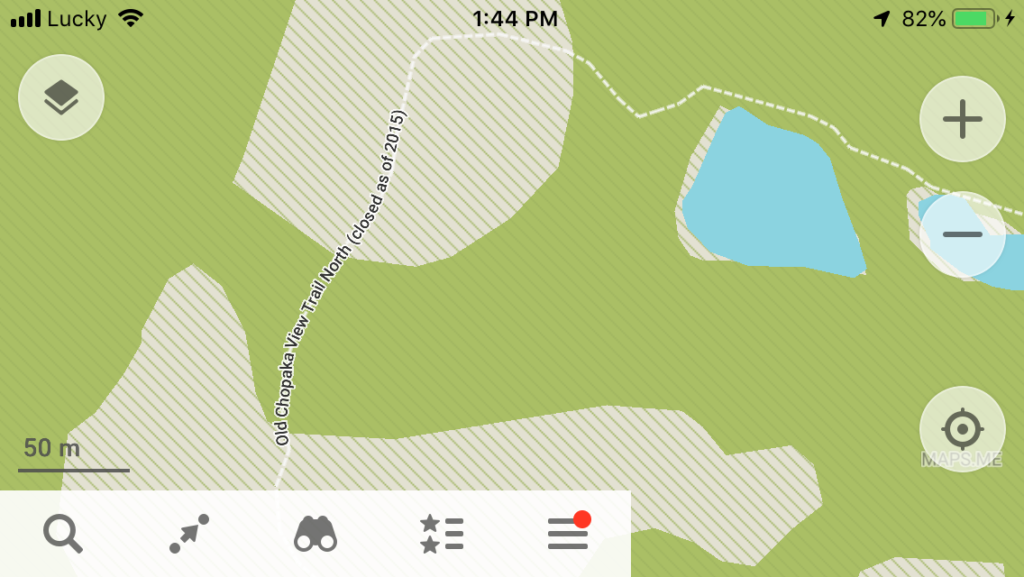
The way back to the parking lot was a little bit of an adventure, mostly because of my insistence on taking a longer trail back. If you’re anything like me, you would find a mysterious trail on your map (unmarked in real life) very intriguing. I’ve added some screenshots from my maps.me app so that you can get a better understanding of where we went.
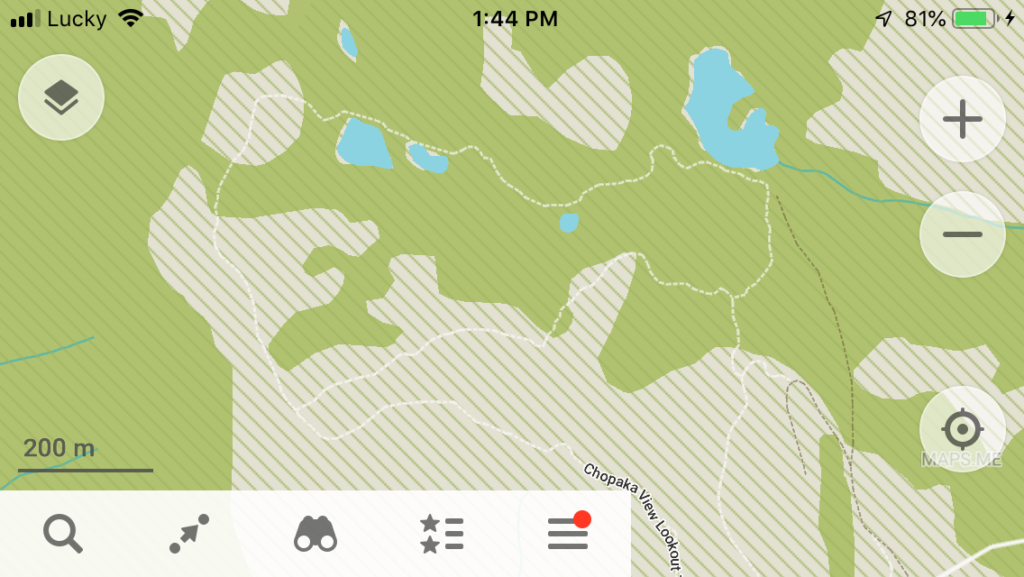
You’ll notice here that on my map the Chopaka View Lookout trail seems to fork in two directions on the left side before turning back towards the parking lot (bottom right of the map).
Going right once you hit that fork takes you on the main trail that is currently marked with posts. Leah and I however, had more time to kill and thought we would opt for the longer loop back which passes by those bodies of water you see.
Now I was aware of the fact that on my map it said that the trail we were taking has been closed since 2015, which you’ll see in the photo below. I suppose technically we should not have been on it, but I thought hey if there was once a trail then it should be good enough to pass through.
The closed trail is sort of marked with orange markers and tape on trees, however a lot of fallen trees made it a little more difficult to get through and follow. But it was still a nice trail, well-covered in trees and a few nice little hills to climb up.
As for the bodies of water…
Well it turns out that either A) we came at a very dry season or B) those bodies of water have ceased to exist with the closure of this trail. What was left was a dried up swamp with a bunch of fallen trees scattered around.
We also ran into some confusions at the end of the trail, and had a little trouble reconnecting with the main trail. In the end we ended up doing a tricky walk through some bushes and reached the vehicle access road which connects a cell tower to the main parking lot where we started.
If you plan on going to Mount Kobau I would suggest taking the main trail that is still open to avoid getting confused on the older trail. All in all though, I’d say Mount Kobau is worth the dirt road drive up (even if you’re in a Kia Forte) and it’s an easy walk so there’s no excuse not to go!
Our tarp had fallen down the previous day when we came back from Mount Riordan, but since it hadn’t had rain yet, we thought it was fine to leave it down. Unfortunately, once we got back to the campsite after Mount Kobau, it had been raining already an hour.
Our chairs were soaked, and we procrastinated for at least half hour while staring at our wet chairs and useless tarp from the dryness of our car. At one point we were actually ready to give up and thought about driving back to Vancouver.
But then we realized driving back in the dark increases our chances of deers crashing through our windshield. Eventually we found the energy to get off our butts to try and fix the tarp.
Thankfully, the rain let up for a while, we fixed the tarp, and were able to start a fire! Again if you want to watch us struggle with the tarp, I suggest you check out my Youtube video, I promise you our cluelessness does not disappoint.
I hope you’ve found the info in this blog helpful and informative for when you’re planning on visiting the Similkameen area. I think this a beautiful countryside area and even just driving around was such a pleasure. If you have time to squeeze in a quick hike or some wine tasting then I would suggest that too! If you’ve visited this area and have some tips or experiences to share please leave a comment 🙂
Next week I’ll be posting a guest blog from Leah. She’s been living in BC for three years, and did 6 different camping trips in BC this past summer alone! She’ll be sharing some tips on how to successfully book a campsite in the busy season. Stay tuned and have a great week folks! Thanks for reading about our cute adventure in the Similkameen region in BC!
Don’t forget to Follow me on Twitter, Facebook, Instagram, YouTube and Substack for more!
Much Love,
Danika

